Example 1: Interactive 3D Rock Sample Viewer with Embedded Quizzes for Mineral Identification
The plan: In an igneous and metamorphic petrology course, students must learn to identify common minerals in hand sample based on color, habit, cleavage, and other macroscopic properties. However, physical rock collections are often only available during limited lab hours, and students may not have enough repeated exposure to build confidence. I would like to address this problem of limited access to physical samples outside of class and help students practice mineral identification in a low-stakes, self-paced environment. The learning outcomes for students would be to:
- (1) Accurately identify common igneous and metamorphic minerals in hand sample.
- (2) Use diagnostic macroscopic properties (e.g., color, luster, cleavage, hardness).
- (3) Self-assess their knowledge through embedded formative assessment.
My plan is to create or curate a set of interactive 3D rock models using a free platform like Sketchfab, each with embedded quiz questions focused on mineral identification.
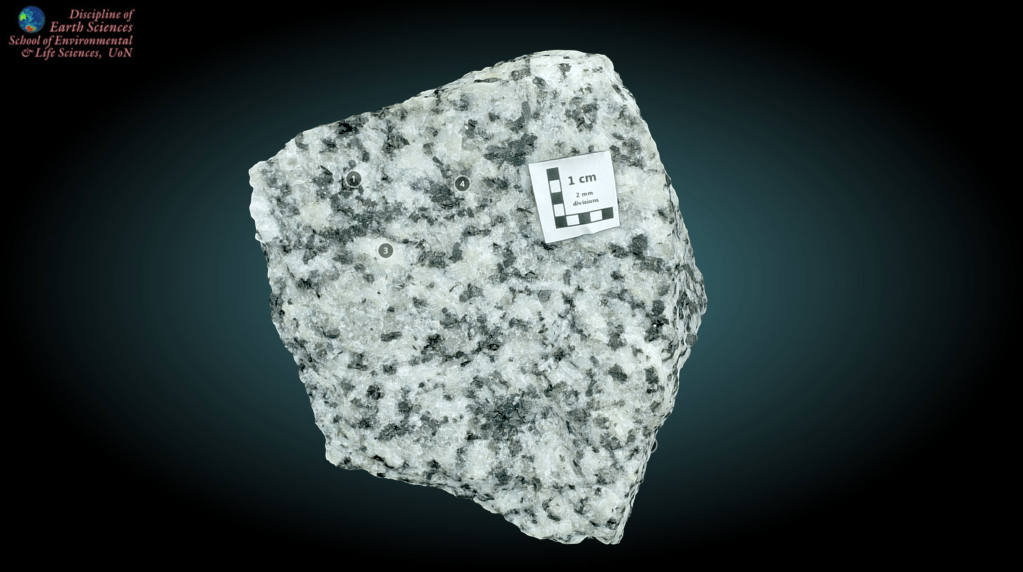
Implementation: I would select 10–12 key rock types from the course that are rich in identifiable minerals (e.g., granite, gabbro, diorite, peridotite, eclogite, garnet schist, marble, gneiss, amphibolite, slate). For each, I would find an existing 360° rotating 3D model on Sketchfab or photograph a physical sample from the department collection to create my own model using free photogrammetry software.
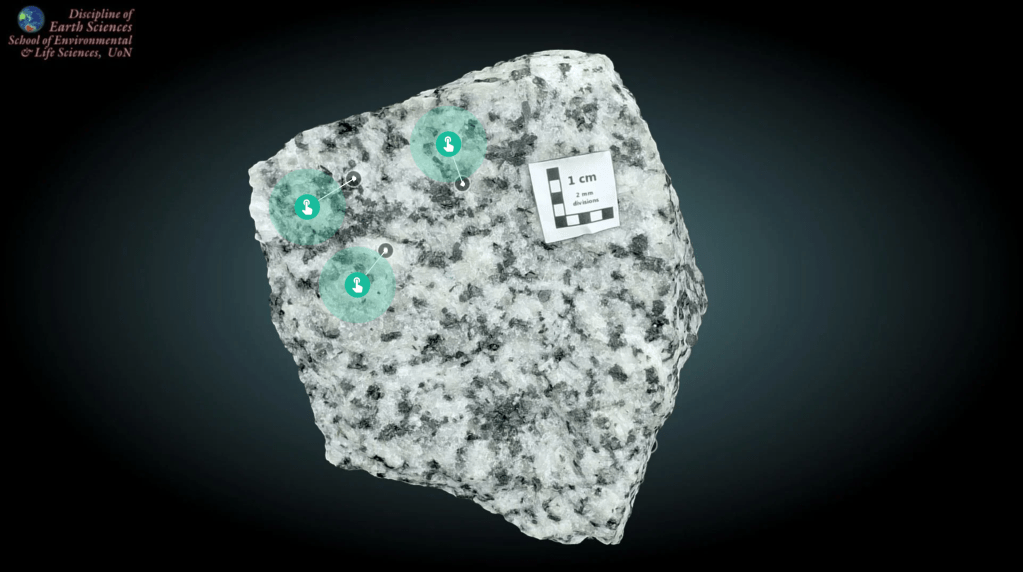
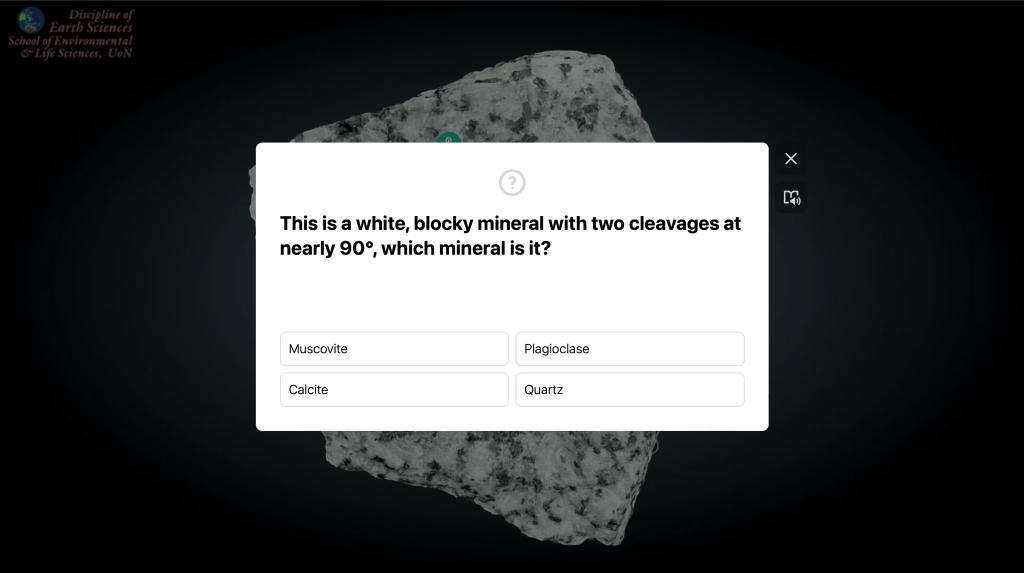
Using ThingLink, I would embed the model and add 3–5 interactive “hotspots” that ask mineral identification questions. Examples include:
- “This is a white, blocky mineral with two cleavages at nearly 90°, which mineral is it?” (plagioclase)
- “What dark mineral, which has a splintery cleavage, is this?” (hornblende)
https://www.thinglink.com/view/scene/2105821642130195300
I would post one model per week on Canvas as a pre-lab assignment. Students would complete the embedded quiz (ungraded but required) before coming to lab, and they could retake it as many times as they wanted. In lab, we would then examine the physical versions of the same rocks, and I would reference the digital models during discussion, asking students to compare the 3D online view with the physical sample.
Anticipated outcomes: I anticipate that students would arrive at lab better prepared, having already been exposed to the rocks and key minerals. The ungraded, self-paced format with immediate feedback would reduce anxiety and encourage trial and error. I expect that the ability to rotate and zoom the 3D models would help students see minerals from multiple angles, which is difficult with a static physical sample in a tray. A challenge would be the time required to create or curate 10–12 high-quality interactive models. To manage this, I would start with 3–4 of the most difficult rock types (e.g., distinguishing eclogite from amphibolite, or gabbro from diorite) and expand the collection over multiple semesters. Another challenge might be students skipping the models if not incentivized; I would address this by including one question on the weekly lab quiz directly drawn from the interactive model. In the future, I would expand this integration by having students create their own interactive 3D models of rocks from local field trips or the department collection as a semester project. I would also add audio narration to each model, explaining key mineral identification features for auditory learners. Finally, I would build a semester-long digital atlas that students can use for exam review.
Example 2: Google Earth Pro Geomorphic Features
The plan: In geology, sometimes it is hard to visualize geomorphic features because students either do not have enough field experience or they need a bird’s eye view. I would like to address this problem of limited field experience and help students obtain different perspectives. The learning outcomes for students would be to:
(1) Identify common geomorphic features (e.g., terraces, paleochannels, scarps) using satellite imagery.
(2) Measure scarp offsets using Google Earth Pro tools.
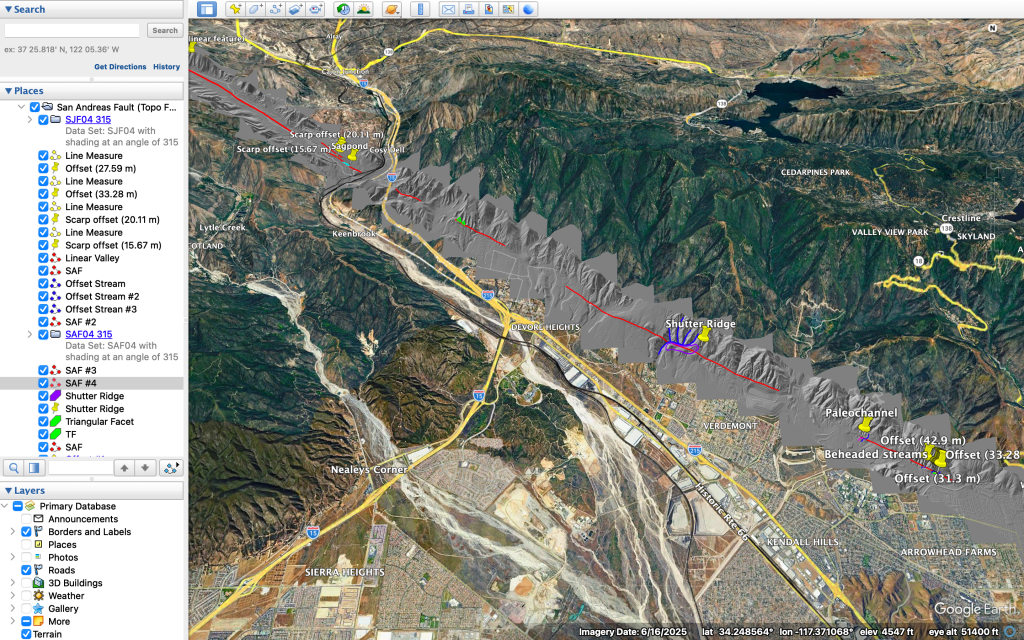
Implementation: I would design an activity for a 75-minute lab session. Students would work in pairs at computers with Google Earth Pro installed. I would provide a worksheet with questions where they would have to identify geomorphic features and use tools to take measurements. Below are some questions I could ask:
- Identify a specific geomorphic feature (e.g., “Find a fault scarp,” “Find a sagapond,” “Find a shutter ridge”).
- Use the placemark tool to mark the feature and write a 1–2 sentence description in the pop-up.
- Use the path or ruler tool to measure the approximate length or width of the feature.
- Take a screenshot and paste it into a shared Google Slides.
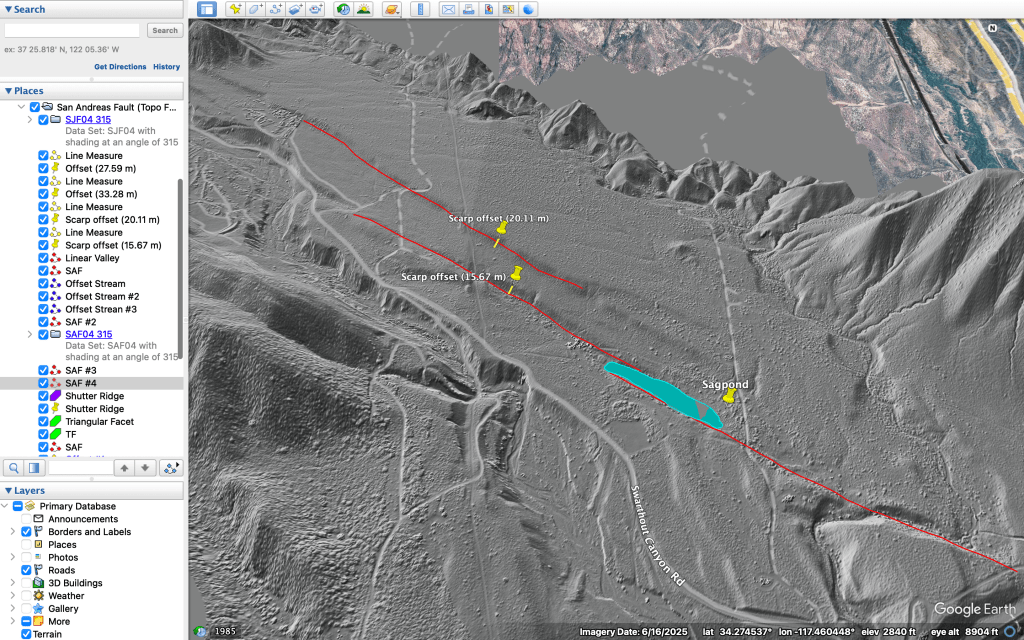

Anticipated outcomes: I anticipate that this activity would significantly improve students’ ability to recognize geologic features. Challenges might include the learning curve for Google Earth Pro tools (placemarks, paths, measurements) and uneven internet access for students working remotely. To address this, I would create a 10-minute video tutorial showing exactly how to use each tool and offer an offline alternative (printed satellite images with tracing paper). Another challenge might be students confusing similar-looking features; I would address this by providing a reference image sheet showing classic examples of each feature type. In the future, I would expand this integration by having students find and present features from other known regions or from a local field trip.
